
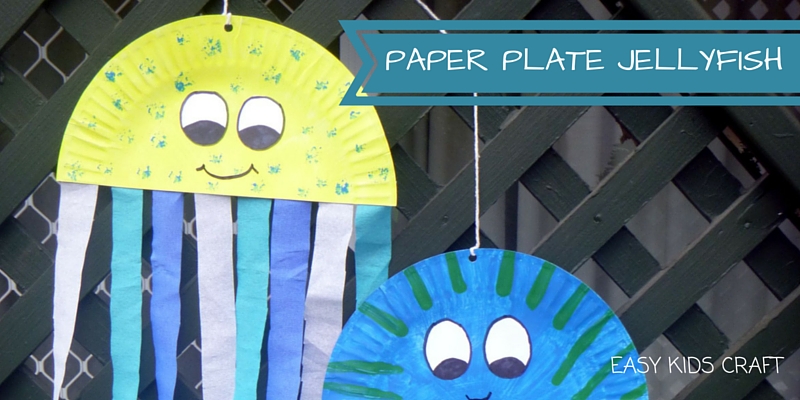
How to make a Paper Plate Jellyfish is another super easy craft idea for your kids.
Everyone has left over paper plates so why not use them and have your kids create something fun.
Just cut a plate in half, draw on a funky face and decorate. Then add the tentacles making them as long as your child’s imagination.
Skill Level – EASY
Time Required – 15 minutes
So let’s get started.
How to Make a Paper Plate Jellyfish
First, let’s get everything ready so you can leave the little ones to get busy and avoid all those interruptions.
What you will need
• Paper plates
• Paints or markers
• Crepe paper
• Glue
• String
Step 1
Cut a paper plate in half so your child can make two jellyfish by using one paper plate.
Step 2
Now your child gets to use their imagination to decorate the face of the jellyfish. Paint the paper plate and let it dry first before decorating a funky face. If your child is steady with painting you can draw the eyes on first then paint around.
If not cutting out the eyes and glueing on after painting is a lot easier.
Step 3
Cut strips of crepe paper as long as your child likes and glue them to the back of the jellyfish face covering the bottom of the flat edge.
Step 5
You are just about finished. Put a hole in the top of the jellyfish and thread the string through. Don’t forget to tie off.
Now all you have to do is hang it close to a window and watch its tentacles sway in the breeze.
I hope you’ve enjoyed this guide on How to Make a Paper Plate JellyFish and If you’ve got some great variations on this colourful craft idea then please feel free to leave them in the comments below.
Or maybe share a photo or two on my Facebook Page.

Comments are closed, but trackbacks and pingbacks are open.